Why DFM Starts Before the CAD
Most engineers write their CAD first and think about manufacturing second. That ordering is what makes CNC quotes come back surprisingly expensive, a model that looks clean in Fusion or SolidWorks can hide three or four decisions that each tack on hours of machine time. The twelve tips below are the design habits that reliably save money and lead time when you send a file to a shop like RivCut.
This list started as a YouTube video aimed at makers and hobbyists. The physics is the same for production parts; we’ve just reframed each lesson around the one question that actually matters for your quote: how does this choice show up on the invoice?
1. Forces Change as Things Move, Your CAD Model Is Static
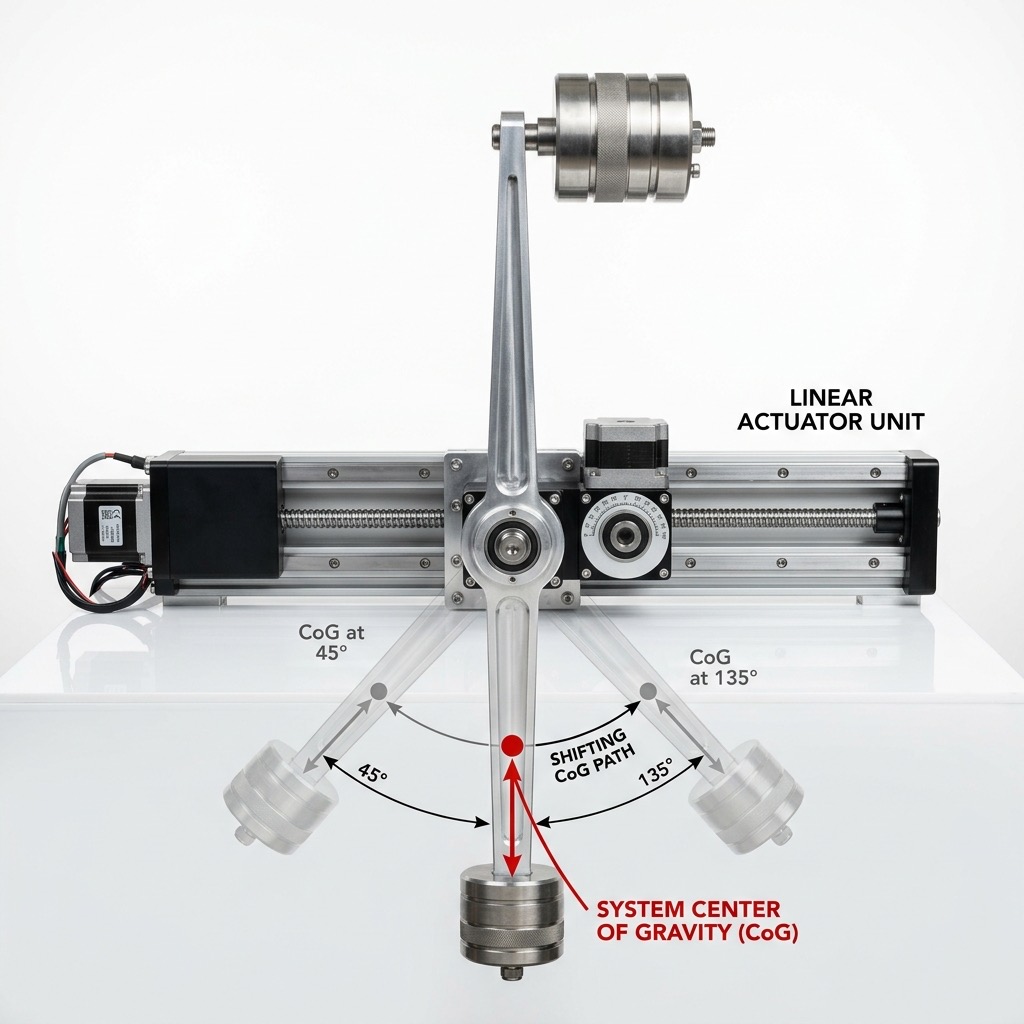
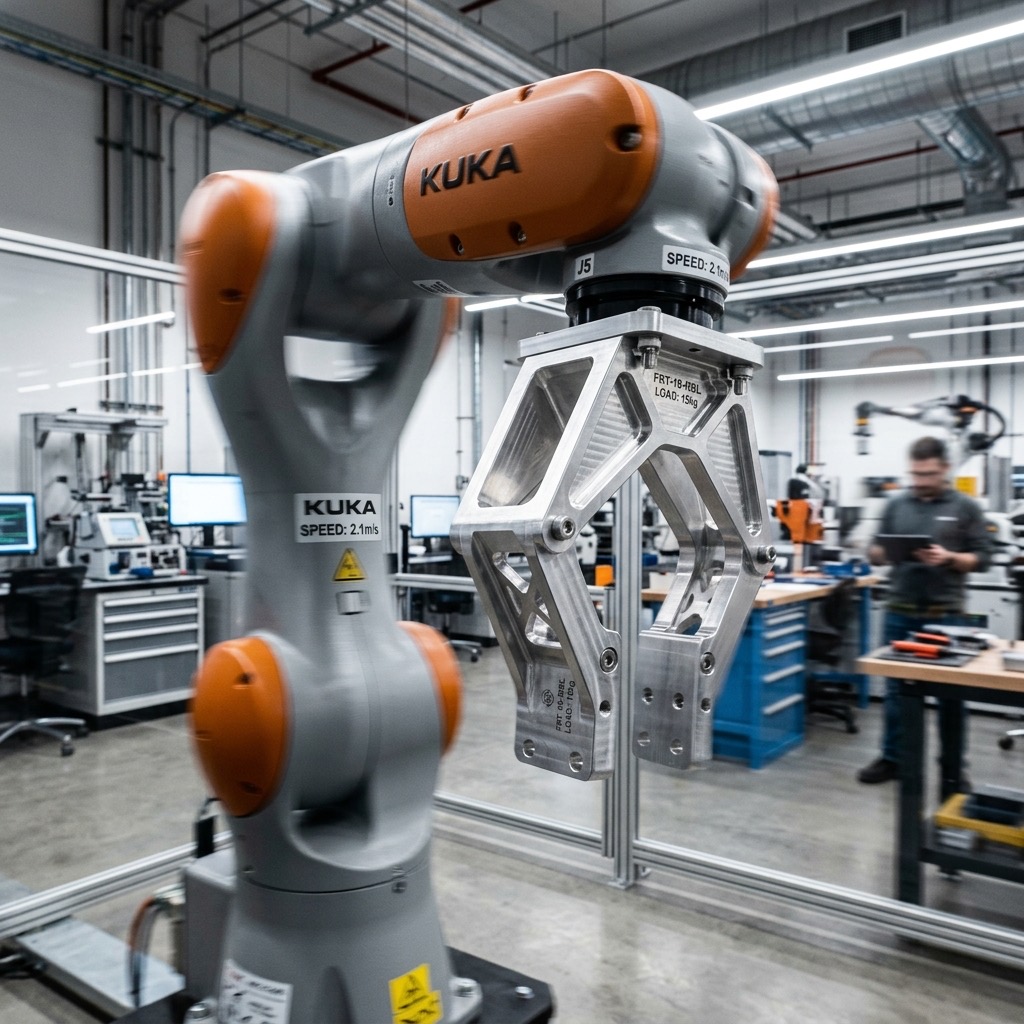
A CAD model sits still. The real part doesn’t. As a mechanism rotates or extends, its center of gravity shifts and the forces on every joint, bolt and mounting surface can double or triple, without the total weight ever changing. That’s a demo you can run in five seconds with a fish scale and a weighted actuator and it’s the single most common reason DIY machines fail unexpectedly in the field.
For CNC parts, the practical lesson is: if your design moves, evaluate it in every extreme position before finalizing geometry. A bracket that’s perfect with the arm pointed straight up may be at 2× load when the arm swings horizontal and the mounting bolt holes you designed for the vertical case are now in shear, not tension.
If you discover the shifting-load issue after your parts are cut, you’ll pay twice, once for the original, once for the thicker revision. Spend ten minutes animating your assembly before you click “Save STEP.”
2. Design for Dynamic Loads, Not Just Static Ones
Static load is what the part weighs. Dynamic load is what it feels when you accelerate it. A 5 lb payload on a fast-moving arm can exert 15 to 30 lb of inertial force at the mounting point and that force scales with the square of the speed. Testing your prototype at half-speed tells you almost nothing about how it will behave at full speed.
Try the gallon-of-milk test from the source video: hold a gallon of milk with your arm outstretched, then swing it forward quickly. What felt easy standing still is suddenly hard, because you’re fighting inertia, not just gravity. Your CNC bracket feels the same forces every time your machine accelerates.
Parts that see dynamic loads need more material in the right places, not more expensive material overall. Adding a rib or a gusset costs pennies in CAM. Upgrading from 6061 to 7075 to compensate for flex that geometry could have solved? That’s a 40% material bill increase.
3. Pick the Right Number of Degrees of Freedom
Every joint allows a certain number of directions of motion. A hinge has one. A cylinder-in-cylinder or pneumatic piston has two (translation plus rotation and that rotation is almost always unwanted). A ball-and-socket has three. The fewer degrees of freedom a joint has, the less unexpected motion you’ll chase down later.
In a CNC context, this shows up as: do I machine a pocket for a cylindrical bearing, or a pair of rails? If your actuator is free to rotate when it shouldn’t, you’ll either constrain it externally (adds parts) or buy a twin-rail actuator (adds cost up front but saves complexity everywhere downstream). Decide on purpose, not by accident.
Extra degrees of freedom mean extra anti-rotation features, extra pins, extra thin walls, every one of which is a pocket a CNC has to clear. Simpler joints machine faster.
4. Choose the Right Bearing Before You Design the Pocket
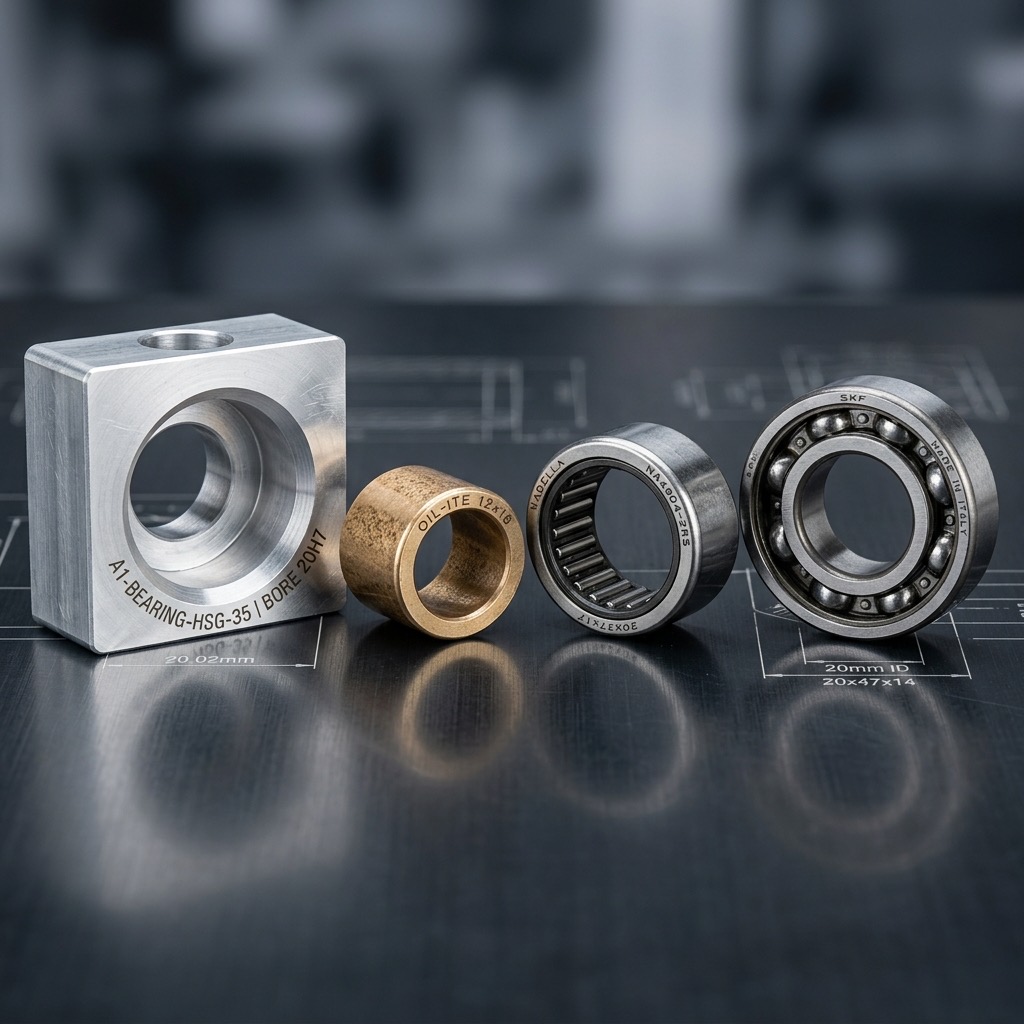
Ball bearings, needle bearings, thrust bearings, one-way clutches, cross-roller bearings, plain sleeve bushings, the catalog is enormous and the bearing you pick dictates the pocket geometry you have to machine. Designing the pocket first and then shopping for a bearing that fits is how you end up with an impossible-to-source $200 custom bearing instead of a $12 off-the-shelf one.
Sometimes you don’t need a bearing at all. A plain oil-impregnated bronze bushing (often called a sleeve or journal bearing) is cheap, accepts wide tolerances and is perfect for low-speed, low-duty applications. On the other end, high-speed spindles need precision angular-contact bearings with sealed preloads. Pick the class of bearing, read its dimensional drawing and then design the pocket around it.
Bearing pockets are tolerance-sensitive features. A pocket called out at ±0.0005” doubles inspection time and often adds a finishing pass. Loosening to ±0.002” where the bearing spec allows can cut that feature’s cost by 30%.
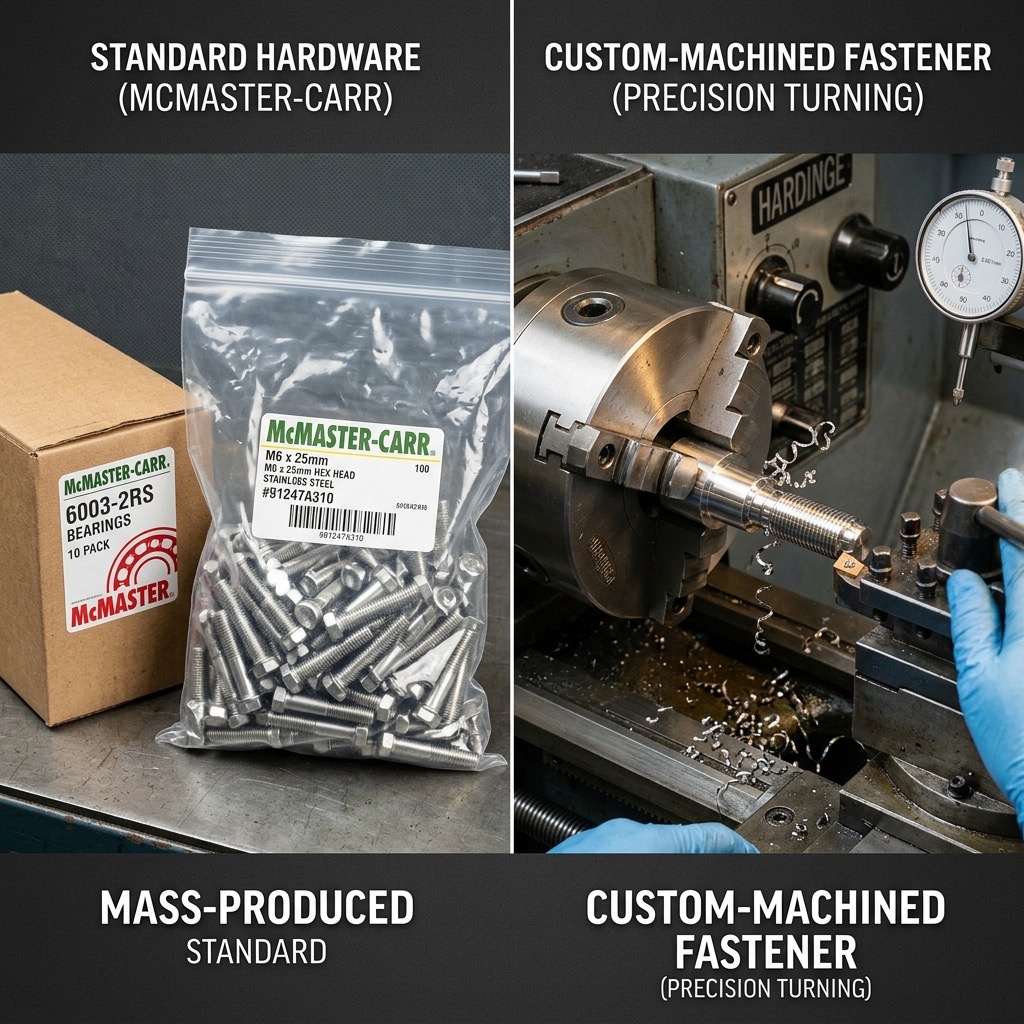
5. Don’t Custom-Machine What You Can Buy Off the Shelf

If there’s an M5 screw, a 608 bearing, a standard dowel pin, or a common O-ring that would do the job, use it. The #1 way hobbyists and startups overspend on CNC quotes is by machining fasteners, bushings, or retention features that McMaster-Carr sells for under $1. A custom fastener can cost 20–50× the off-the-shelf equivalent and adds weeks of lead time.
The exception proves the rule: when you do need a custom part (a structural housing, a one-off bracket, a specialty jaw), that’s exactly the kind of work shops are optimized to do fast and well. Use them for the parts only they can make; let commodity suppliers handle the commodity parts.
Before uploading, audit your BOM for anything that could be a stock part. Every swap from custom to off-the-shelf removes a line from your quote.
6. Counterweights Beat Gearboxes
The original video tells a great story: an engineer is wrestling with a heavy arm that needs to be lifted by hand. He starts designing a rack-and-pinion with a gear reduction, custom gears, custom shafts, custom bearings. A colleague walks up, glances at the screen and says: “Why don’t you use a counterweight?”
A pulley and a matched mass reduces the lifting force to nearly zero. One pulley. One block of scrap steel. No gearbox, no custom machining, no backlash. This is how elevators work and it’s the kind of solution CAD won’t suggest because it doesn’t know anything about physics. Show your design to someone with fresh eyes before you commit to the complicated version.
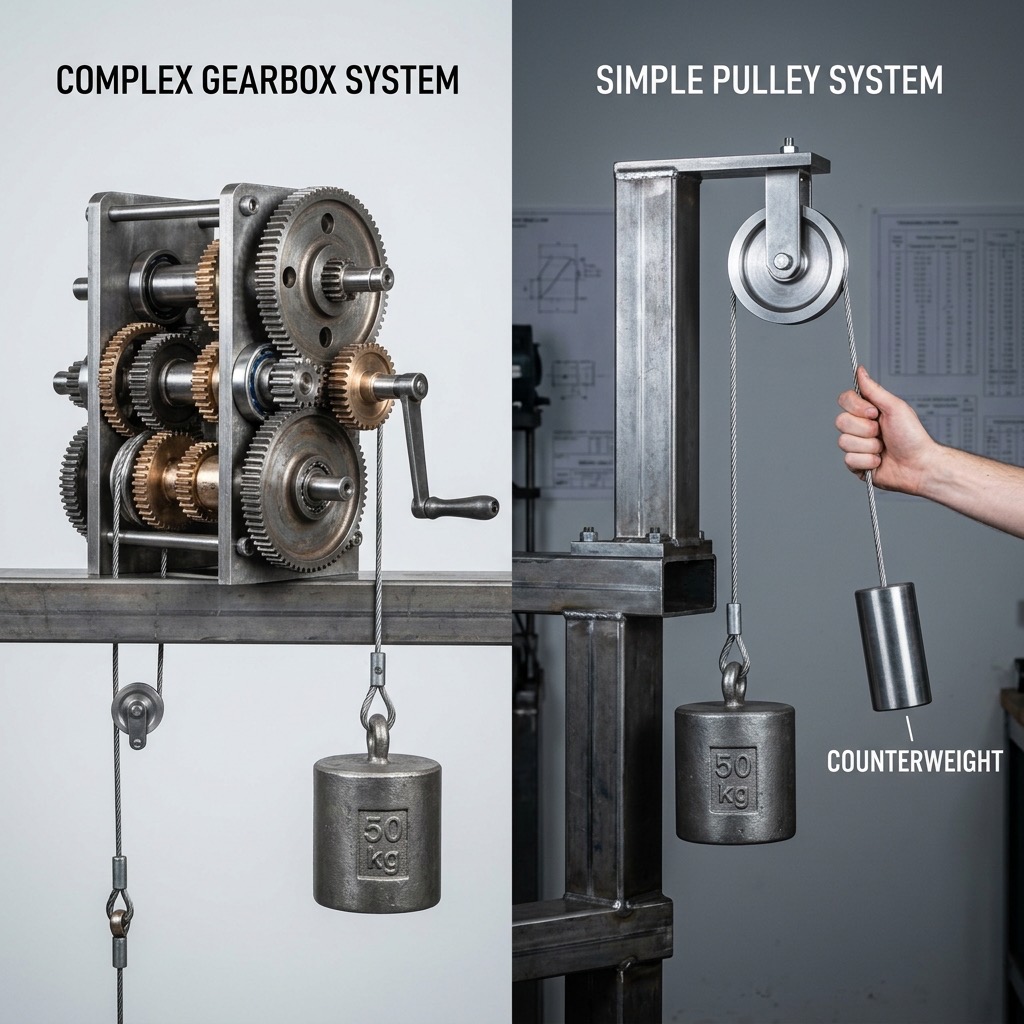
Simple geometry quotes cheap. A shaft-and-pulley assembly is three stock parts plus a plate; a gearbox is twelve custom parts plus three tolerance-critical fits. Always ask if a simpler mechanical solution would solve the same problem.
7. Gears Aren’t Just for Torque, They Flip Direction Too
The second “hidden” job of gears is reversing direction of rotation. If you have a motor that only spins forward, or a drive that can’t be reversed electrically, a pair of gears lets you drive the output either way. Your car’s engine only spins one direction, reverse comes from the transmission.
This shows up in CNC work when you’re designing a hand-crank mechanism, a clock, or a reversible feed. Remember that a 1:1 gear pair (same tooth count) changes direction without changing speed. That’s often exactly what you want.

Custom spur or helical gears can be machined, but standard-module gears from a supplier cost a fraction. If the module, pressure angle and tooth count are commodity, buy them.
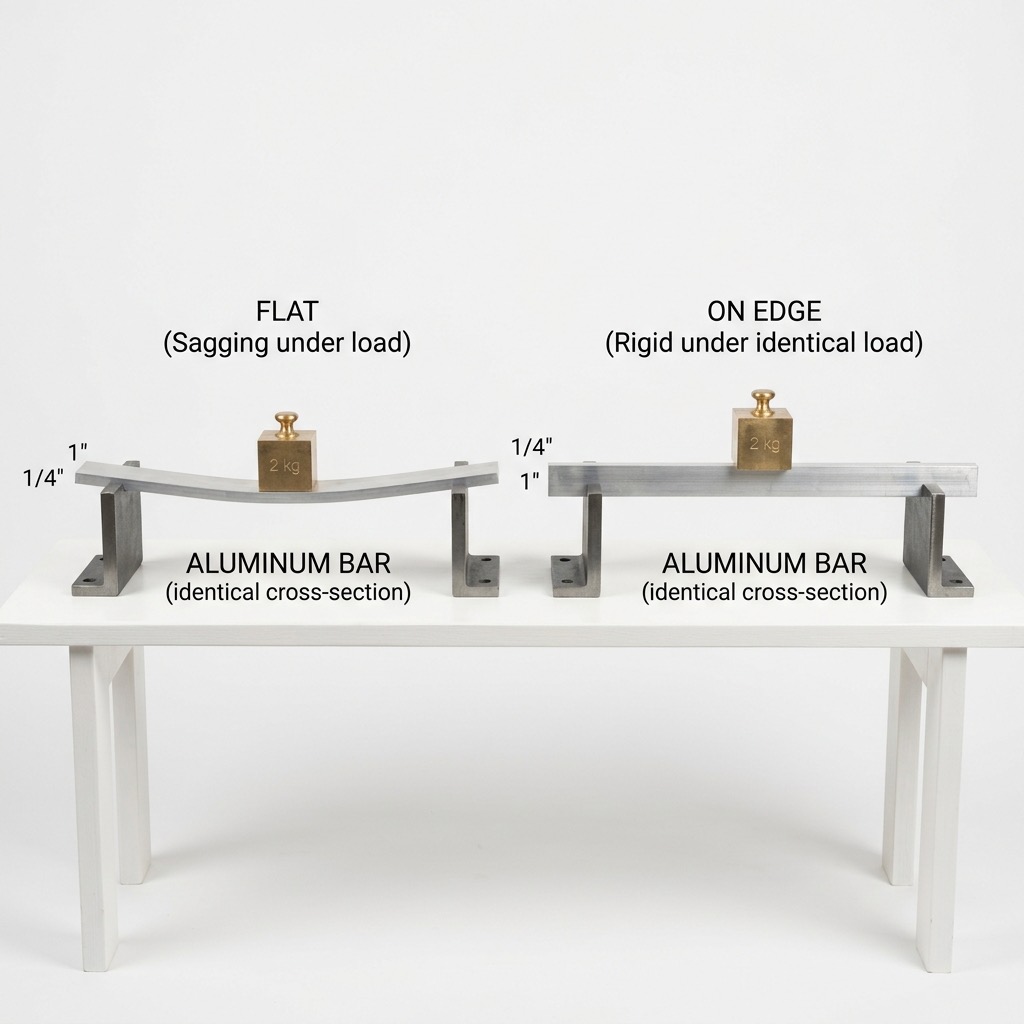
8. Strength ≠ Stiffness
These two get confused constantly. Strength is how much load a material can take before it yields or breaks. Stiffness is how much it flexes under load. A part can be very strong and still sag like a diving board. Upgrading from aluminum to steel to fix sag is almost always the wrong move, you 3× the weight and 3× the material cost to solve a geometry problem.
The classic demo: a thin wood plank and a thin aluminum plank of identical dimensions both sag under load. Rotate the wood plank 90° so the load is along its height instead of its width and suddenly it holds more than the aluminum. Same material, same volume, different geometry. Stiffness scales with the cube of the depth in the direction of the load (that’s the moment of inertia). It’s nearly free in CAD and it’s the single biggest lever you have to reduce material cost on a CNC part.
Don’t upgrade to steel when a rib would do. Adding a rib or changing wall orientation usually costs one extra toolpath; swapping to steel costs new stock, slower feeds, shorter tool life and a longer cycle time.
9. Orient Material Along the Load Path
Tip #8 was the concept; tip #9 is the habit. Before finalizing geometry, draw an arrow on your part showing the direction the main load travels. Now orient your ribs, walls and gussets along that arrow, not across it. An I-beam is an I-beam because the load is vertical; rotate it 90° and it becomes one of the weakest sections in engineering.
In CAM terms: the cheapest way to make a part stiff is to leave material exactly where the stress wants to be. The second cheapest is a rib or web. The most expensive is to bulk up the entire wall. Walk the load path with your cursor before you pocket.
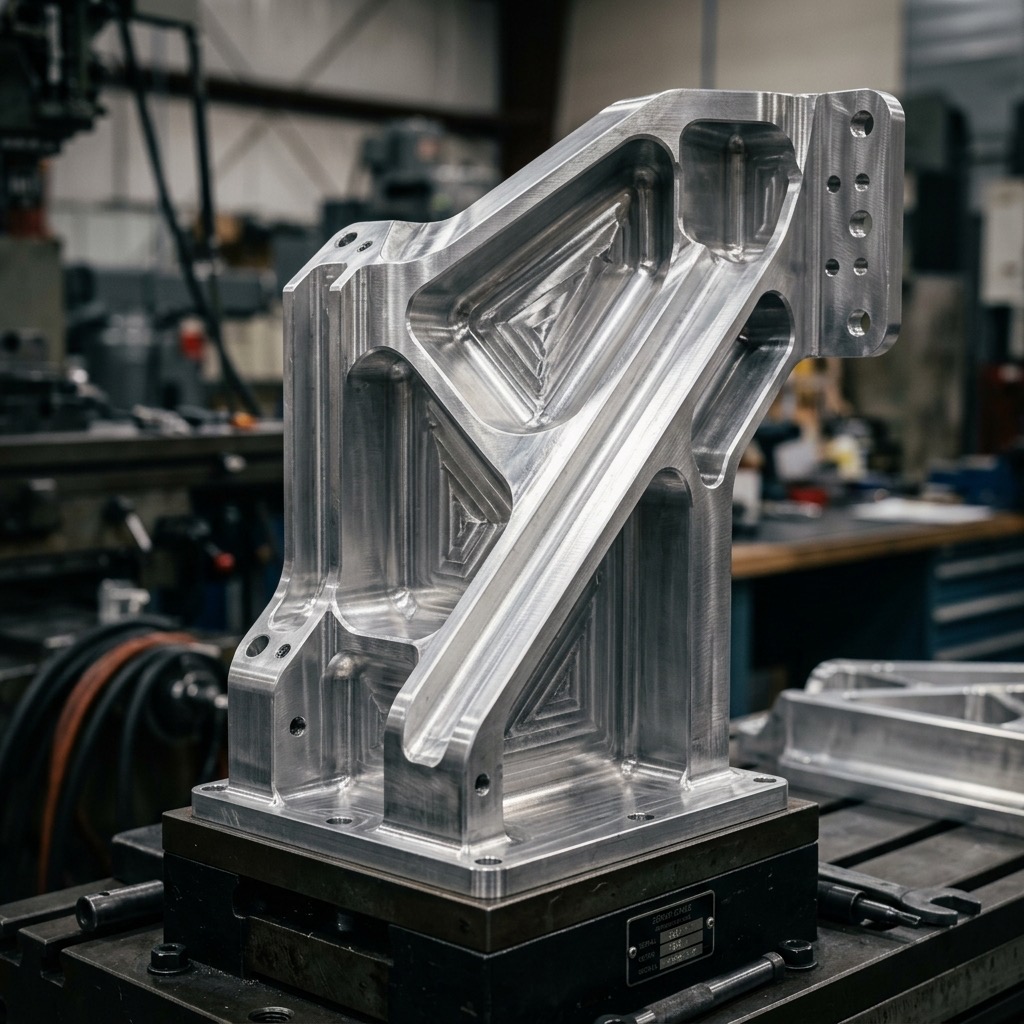
Parts with well-placed ribs weigh 30–50% less than uniformly thick-walled parts with the same stiffness. Lower weight = less stock to pocket out = less machine time = cheaper quote.
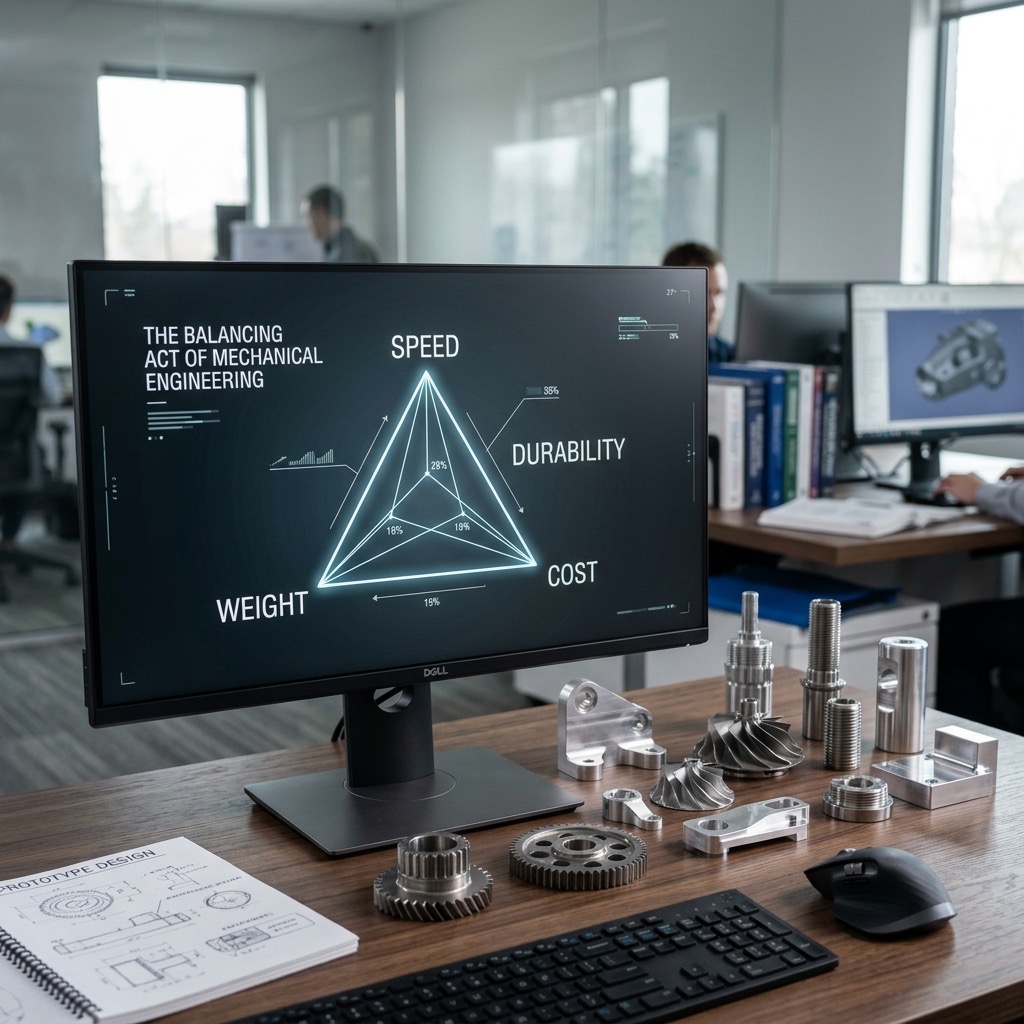
10. Every Decision Is a Trade-off, Define All Four Before You Quote
Engineering isn’t “find the best design.” It’s “find the best trade-off for this customer.” There’s no universally best material, no universally best tolerance, no universally best process. There’s only what’s right for the specific constraints in front of you.
Before you send anything for a quote, define four numbers:
- Speed: How fast does this part need to ship? (3 days vs. 3 weeks is a 2–4× price multiple.)
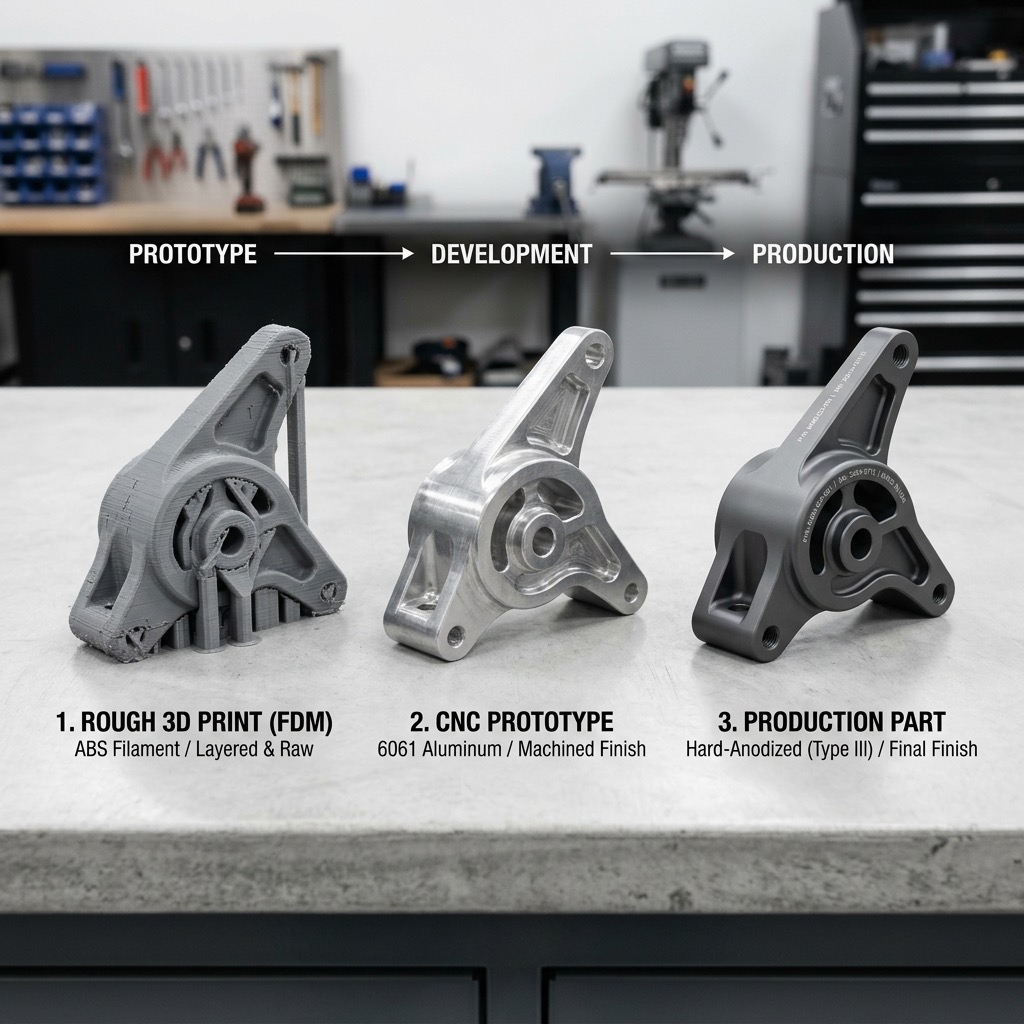
- Durability: How long does it need to last? (A prototype and a production part are different designs.)
- Weight: How light does it need to be? (Every ounce off in aerospace is worth real money. In a workshop fixture, it’s free.)
- Cost: What’s your ceiling? (Set it before you CAD, not after.)
Most over-designed parts come from assuming the maximum for all four. Decide which two matter most and let the other two float. That’s where cost savings hide.
Tell your shop what the part is for, not just what it looks like. A RivCut DFM reviewer can often suggest a ±0.005” tolerance that saves 40% over the ±0.0005” you put on the drawing, if they know the mating part is a loose fit.
11. Ask Your Shop Before You Finalize Geometry
Deep pockets, thin walls, small internal corner radii and tight tolerances on non-functional surfaces are the four features most designers don’t realize are expensive. A 0.125” internal corner on a 2”-deep pocket? That’s a 1/4”-diameter end mill going full depth, slow feeds, short tool life, vibration. A 0.250” corner? Suddenly a 1/2” end mill can handle it and the operation is 4× faster.
A 15-minute DFM conversation with your shop before the final CAD can easily save 20–40% on the quote. RivCut’s DFM review is free on every upload, but you can also just email a work-in-progress STEP and ask for feedback. We’d rather help you fix it now than machine it the hard way.
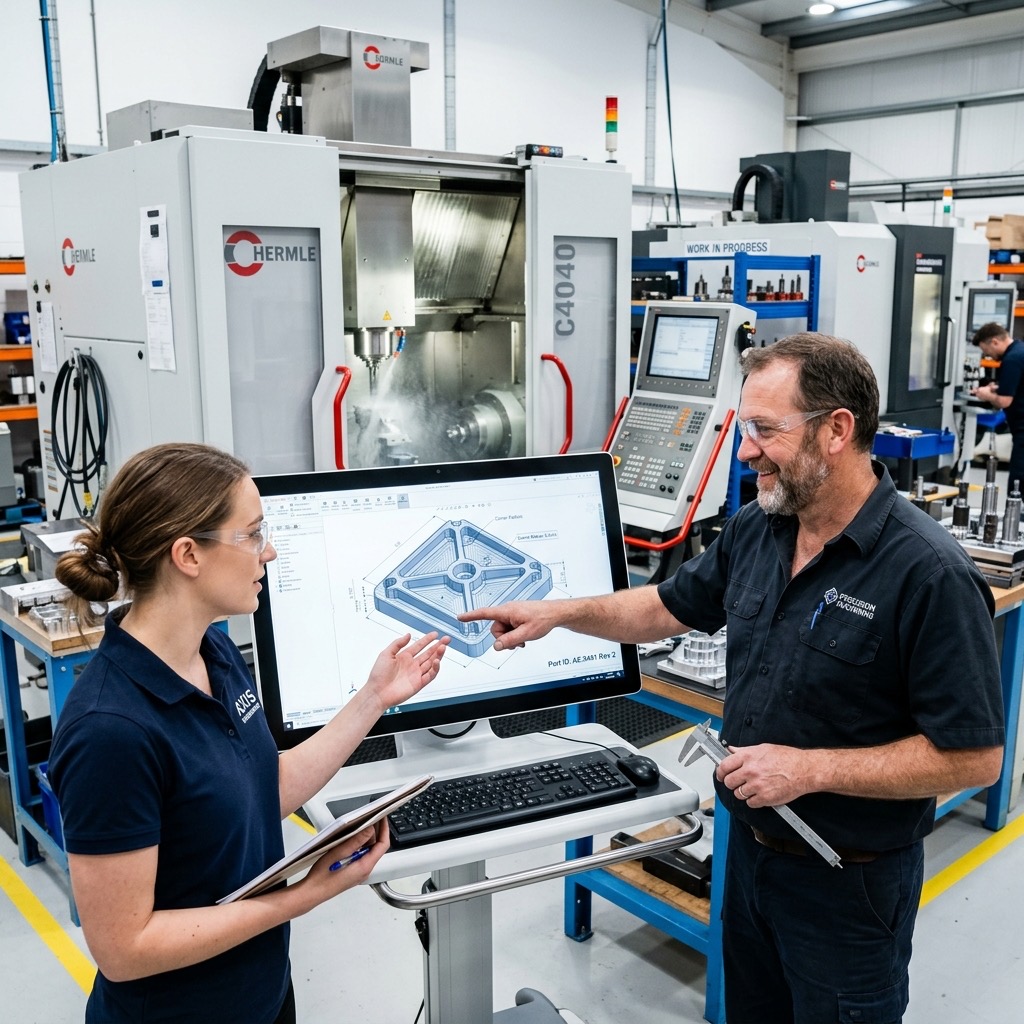
If you have questions about feature size, wall thickness, or tolerances, send a work-in-progress STEP before you finalize. Our engineering team replies within a business day and our DFM review is free.
12. Prototype Fast, Iterate Cheap
The biggest reason engineers avoid CNC for early prototypes is the quote cycle: email the shop, wait 2–3 days, get a number, realize you want to change something, start over. That’s how a two-week project turns into two months.
Instant online quoting fixes that. Upload, see a price in under 60 seconds, tweak a dimension, re-upload, compare. Iteration is basically free, which means you can ship the right part on your first production run instead of the third. That’s why every tip on this list maps to a decision you can test against real pricing in a single afternoon.
Upload a first pass. Apply these twelve tips to the result. Upload again. The difference between the two quotes is the ROI on reading this article.
The best DFM habit is the cheapest one: upload your CAD, look at the price and ask yourself which of these twelve tips would move the number.
Frequently Asked Questions
What is the difference between strength and stiffness?
Strength is how much load a part can carry before it breaks or permanently deforms. Stiffness is how much it flexes under load. A part can be strong but not stiff (it flexes a lot without breaking), or stiff but not strong (it resists flexing but snaps when overloaded). For CNC parts, you usually solve sagging or vibration with stiffness, by changing geometry, not by upgrading to a more expensive material.
Should I custom-machine fasteners for my CNC part?
No. Use off-the-shelf fasteners, bearings and bushings whenever possible. A custom fastener can cost 20 to 50 times more than a McMaster-Carr equivalent and adds weeks of lead time. The same rule applies to dowel pins, O-rings and standard bearing sizes.
What are degrees of freedom in mechanical design?
Degrees of freedom describe the directions in which a joint or component can move. A hinge has one (rotation about one axis). A pneumatic cylinder can have two (translation plus unwanted rotation). A ball-and-socket joint has three. Extra degrees of freedom usually cause unwanted motion, constrain your joints to only the motion you actually need.
Why does dynamic load matter for CNC parts?
A part that sees motion experiences forces far greater than its static weight because accelerating mass creates additional inertial loads. A 5 lb payload on a fast-moving arm can exert 15 to 30 lb on the attachment point. If you only size your part for the static weight, it will fatigue and fail under real conditions.
How do I avoid over-designing a CNC part?
Define all four trade-offs before you CAD: speed, durability, weight and cost. Then ask how much of each you actually need. Most over-designed parts come from assuming maximum values for every requirement instead of defining the minimum that solves the customer’s real problem.