Why Vise Torque Matters
Vise torque controls how hard the jaws grip your part. Too little and the part shifts during a cut. Too much and you bend, crush, or mark the part. Either way, you end up with scrap.
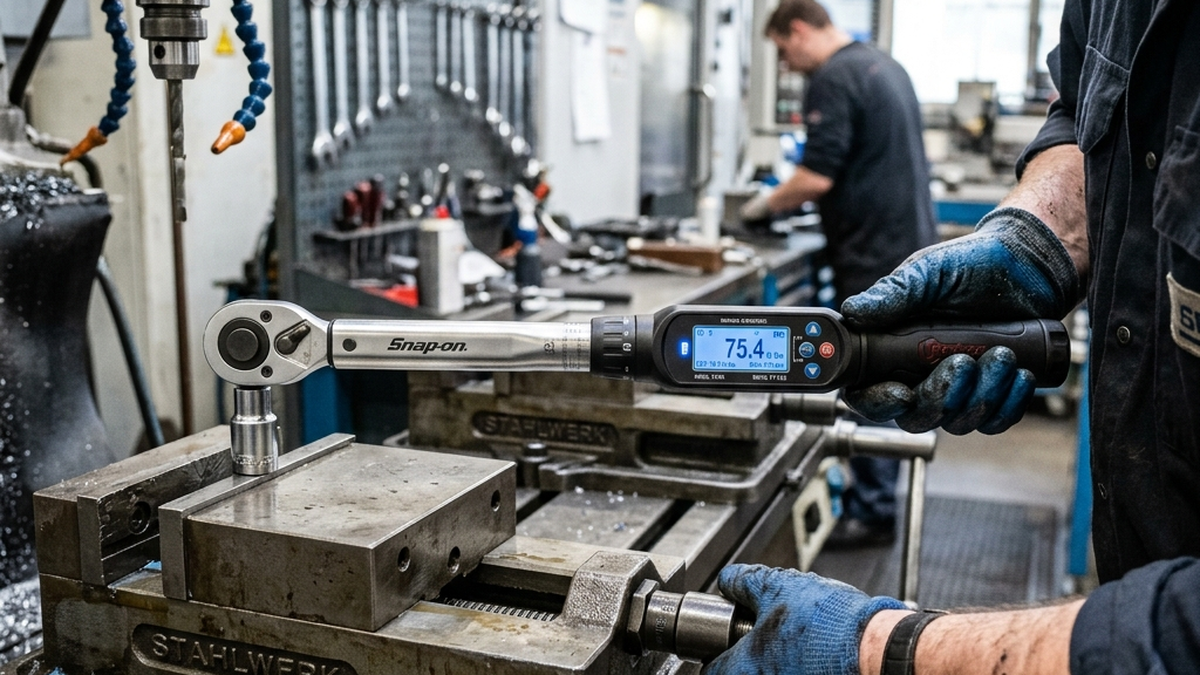
Most machinists tighten by feel. That works until you hand the job to someone else. A torque wrench takes the guesswork out. It gives you the same clamping force every single time.
Consistent torque means consistent parts. If you change nothing else about your setup, start using a torque wrench.
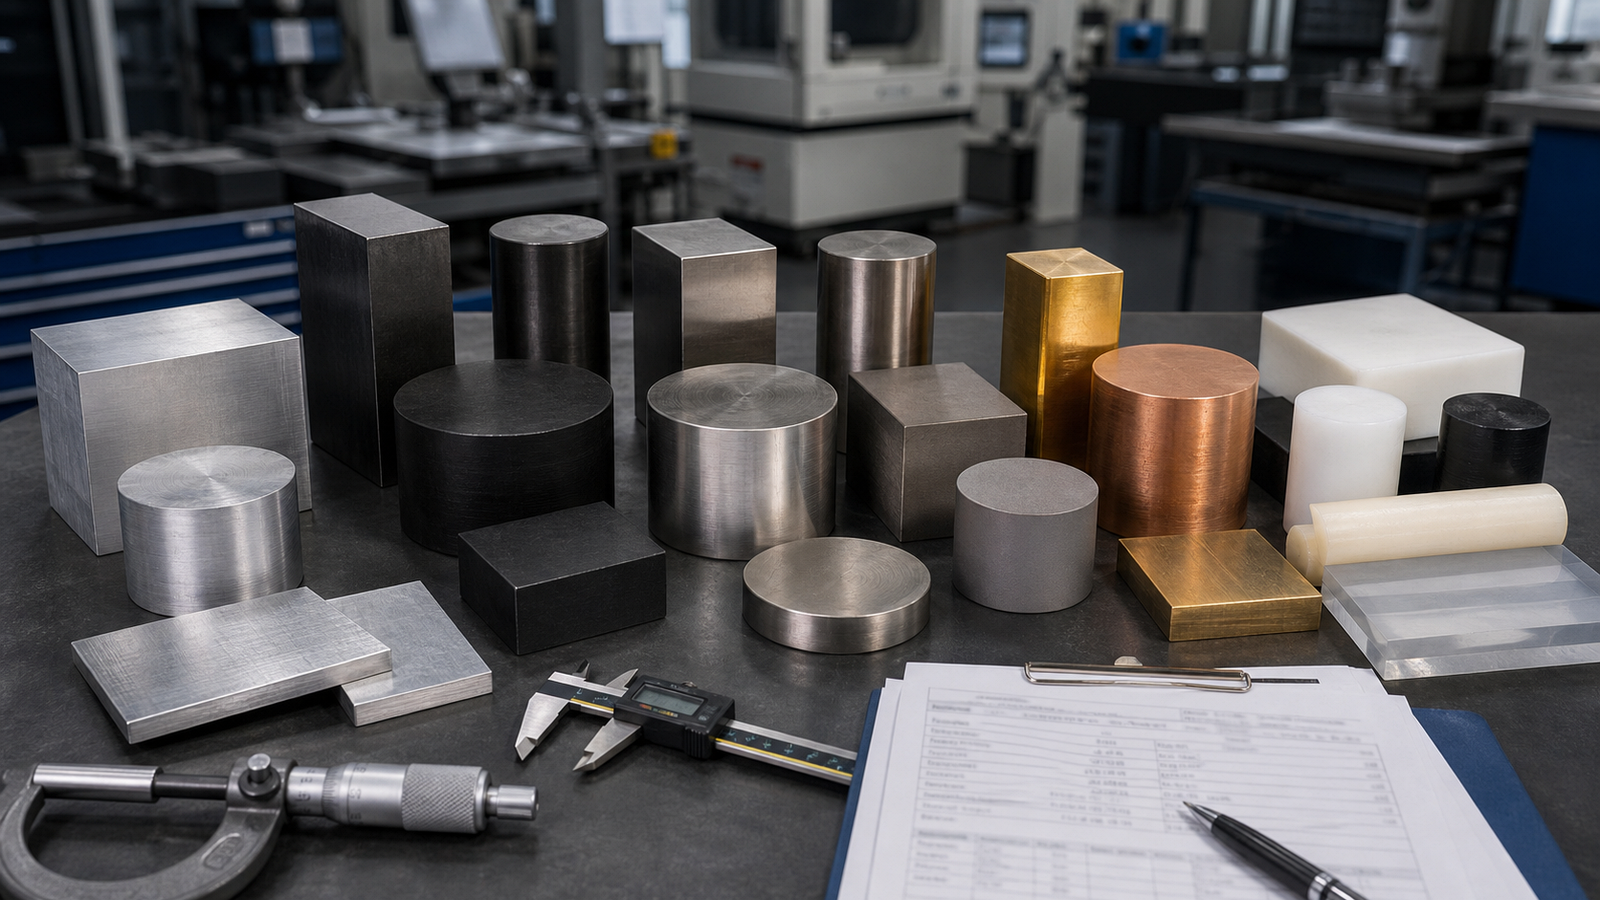
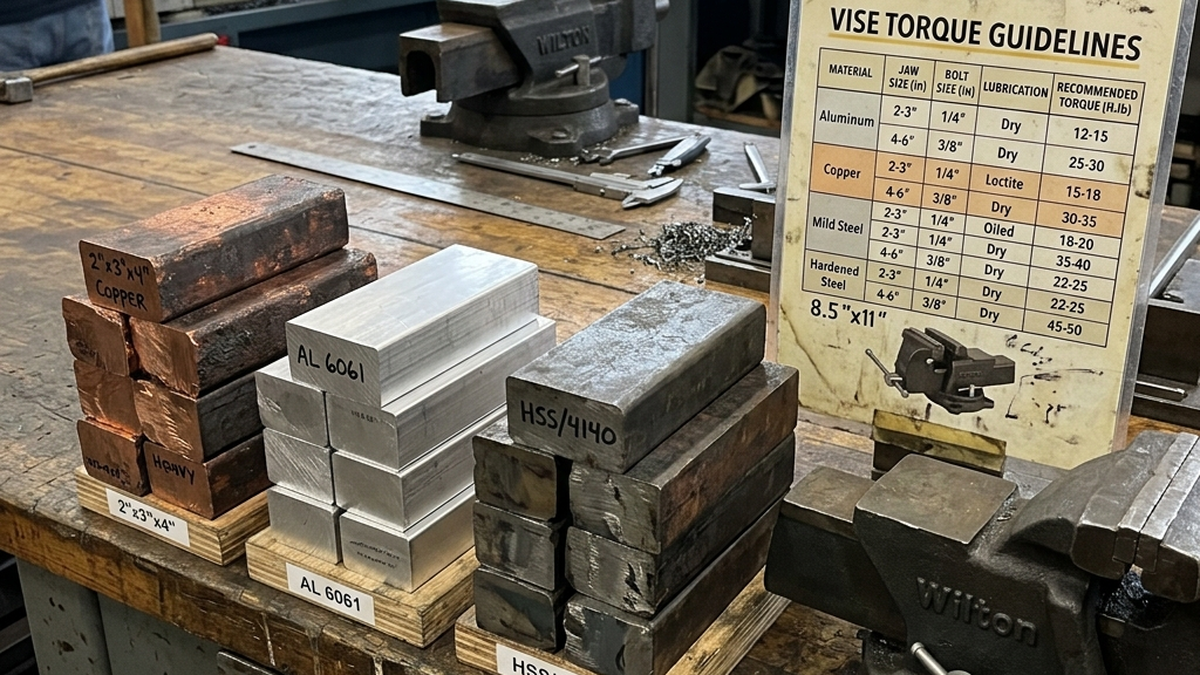
Recommended Torque Values by Material
These values work for a standard 6-inch CNC vise with hard jaws. Adjust down for thin-wall parts. Adjust up for heavy roughing passes.
| Material | Roughing (ft-lbs) | Finishing (ft-lbs) | Thin-Wall (ft-lbs) |
|---|---|---|---|
| 6061 Aluminum | 25-35 | 15-25 | 8-15 |
| 7075 Aluminum | 30-40 | 20-30 | 10-18 |
| Mild Steel | 40-55 | 30-40 | 15-25 |
| Stainless Steel | 45-60 | 35-45 | 18-30 |
| Titanium | 40-55 | 30-45 | 15-25 |
| Brass | 20-30 | 12-20 | 8-12 |
| Plastics (Delrin, PEEK) | 10-20 | 8-15 | 5-10 |
Start at the low end. Run a test cut. If the part moves, add 5 ft-lbs and try again. This is safer than starting too high and crushing a finished part.
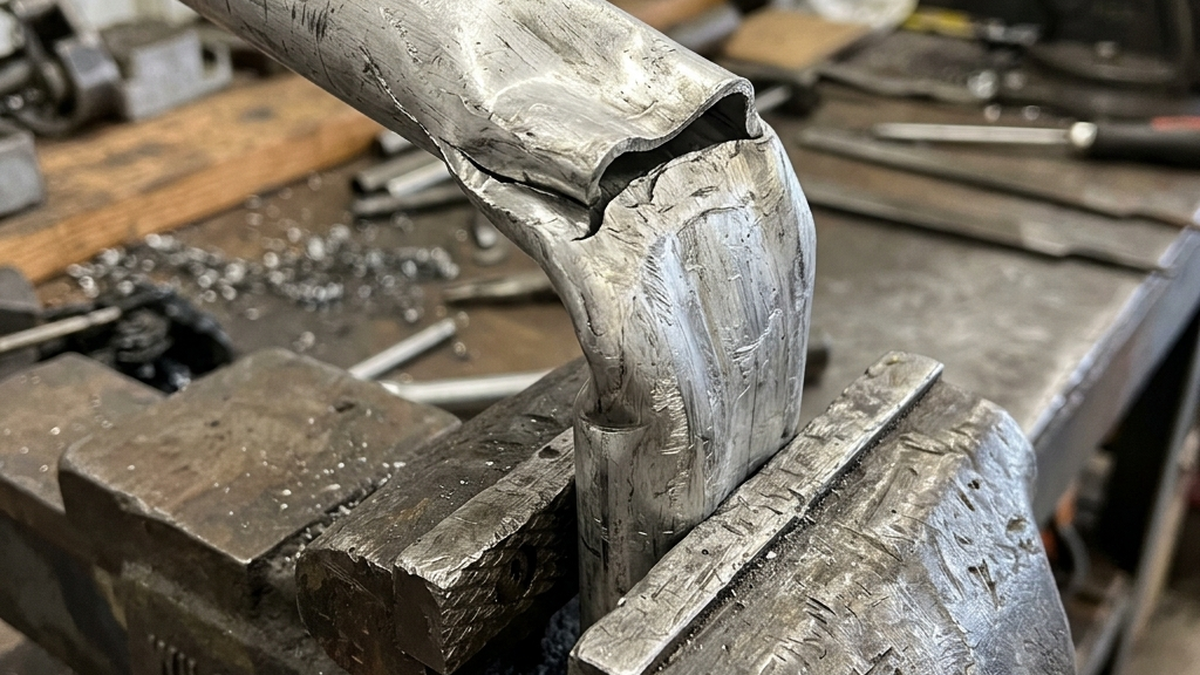
What Over-Clamping Does to Your Parts
Over-clamping is one of the most common mistakes in CNC work. Here is what happens when you tighten too much.
- Jaw marks, Hard jaws leave dents and lines on the part surface. These need extra finishing to remove.
- Dimensional distortion, The part bows or bends under clamping force. It measures right in the vise but springs back when you release it.
- Thin-wall crushing, Walls under 0.060" thick can collapse completely under full torque.
- Internal stress, Over-clamping adds stress to the part. This causes warping after machining, especially in aluminum.
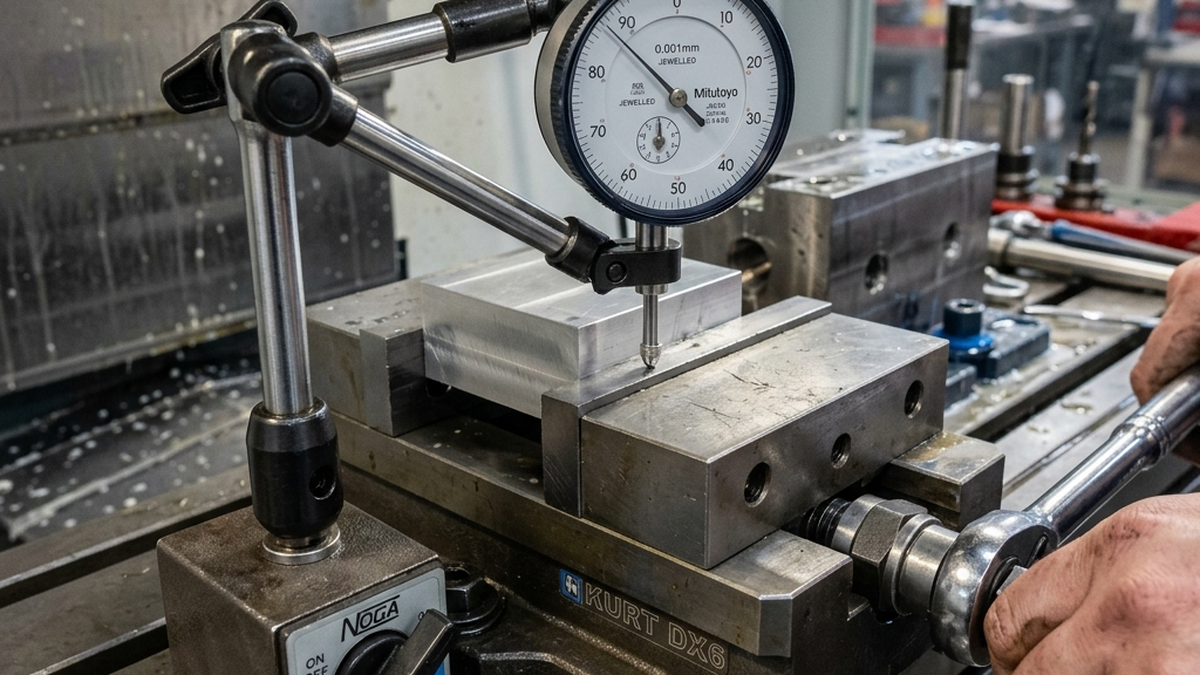
If a part measures in-spec in the vise but goes out of tolerance after release, over-clamping is the likely cause. Reduce your torque and re-check.
Choosing a Torque Wrench for CNC
You need a torque wrench that fits your vise handle socket. Most CNC vises use a 3/4" or 7/8" hex drive. Here are your main options.
- Click-type torque wrench, Clicks when you hit the target. Simple and reliable. Best for most shops.
- Beam-type torque wrench, Uses a pointer and scale. Cheap but harder to read in tight spaces.
- Digital torque wrench, Shows exact reading on a screen. Most accurate but costs more.
A good click-type wrench in the 10-80 ft-lb range costs $50-$150. That is cheap insurance against scrap parts.
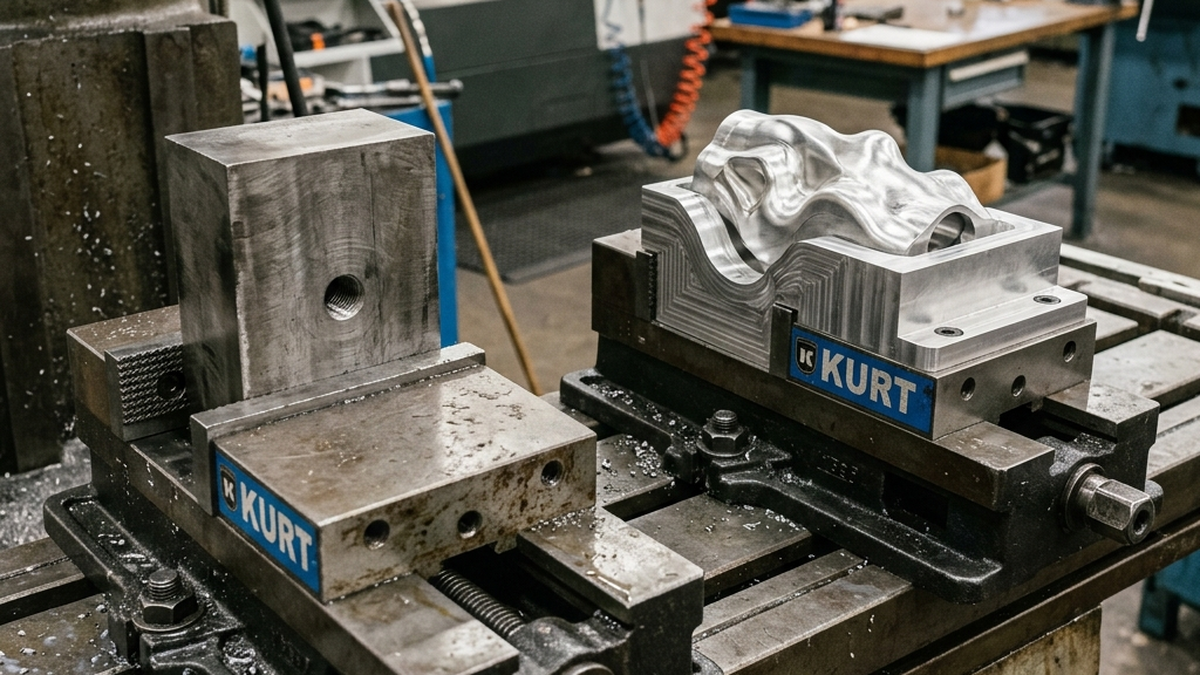
Soft Jaws vs Hard Jaws for Torque
Soft jaws spread the clamping force over a larger area. This lets you use less torque while holding the same grip. Hard jaws focus force on two narrow contact lines.
For thin-wall or finished parts, soft jaws are almost always the better choice. You can machine them to match your part profile. This gives full-surface contact and prevents jaw marks.
- Soft jaws: Lower torque needed, better for finished surfaces
- Hard jaws: Higher torque needed, better for raw stock and roughing
Torque Tips for Thin-Wall Parts
Thin-wall parts need special care. Walls under 0.100" thick can distort under normal clamping force. Here are strategies that work.
- Use soft jaws, Machine them to match the part shape. Full contact reduces point loading.
- Reduce torque 50%, Start at half your normal value. Add torque only if the part moves.
- Add support, Place a parallel or support block behind the thin wall. This resists the clamping force.
- Consider vacuum fixturing, For very thin flat parts, vacuum removes clamping distortion entirely.
- Machine in stages, Rough with more stock left. Reduce clamping for the finish pass.
Need help with your next project? Upload your CAD file and our engineers will recommend the right workholding approach during your free DFM review.
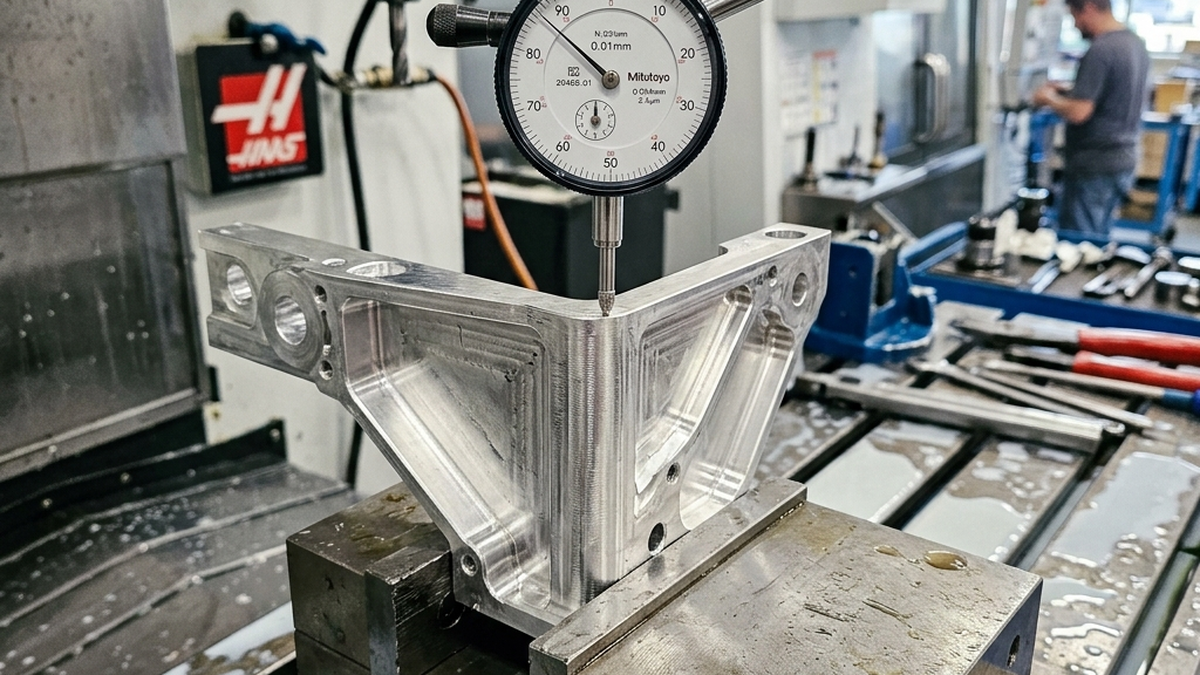
A Repeatable Torque Process for CNC Setups
Vise torque is easy to overlook because the handle feels simple. In reality, torque is part of the process plan. The same part can cut accurately at one clamp load and distort badly at another. A setup sheet should record the vise, jaw style, part contact area, torque value and whether the part is clamped on raw stock, finished faces or soft jaws.
For repeat work, do not rely on "tight enough." Use a torque wrench or torque-limiting handle and record the value that worked during first article inspection. That way the second shift, next month’s repeat order and a different operator can reproduce the same condition. This is the foundation of repeatable CNC vise torque setup.
Torque should also be checked after the first few parts. Chips under the part, jaw wear and small burrs can change how force enters the workpiece. If the first part measures well but the fifth part shows taper, chatter or a bowed wall, the fix may be cleaning and torque control rather than a program change.
Special Cases: Thin Walls, Soft Materials and Second Ops
Thin-wall parts need lower and more distributed clamping force. The goal is to prevent movement without turning the vise into a press brake. Soft jaws, larger contact surfaces, step jaws and support under the part can allow lower torque while keeping the setup rigid. A common mistake is increasing torque to solve chatter when the real problem is unsupported geometry.
Aluminum, brass and plastic parts are more likely to show dents or clamp marks than steel. If the cosmetic surface matters, specify it on the drawing. For a second operation, use soft jaws that locate on a machined feature whenever possible. That allows the shop to reduce clamping pressure and still hold position.
For very small parts, torque numbers are less useful without contact area. Ten foot-pounds applied through a narrow edge can damage a part that would survive higher torque through a full-profile jaw. That is why CNC vise torque for thin wall parts and how much torque to use on aluminum soft jaws are setup questions, not universal chart questions.
Long-Tail Questions This Article Answers
This article covers recommended CNC vise torque by material, how to prevent over clamping CNC parts, torque wrench for CNC vise setup, vise torque for aluminum machining, soft jaws vs hard jaws clamping torque, CNC clamping force for thin wall parts, repeatable vise torque for production machining and why CNC parts move in the vise.
When in doubt, start with a conservative torque, prove the setup with inspection and increase only when the part shows movement under cutting load. More torque is not automatically more security.
How Buyers Can Prevent Torque-Related Problems
Buyers can help by identifying fragile features before the shop builds the setup. Thin walls, tall bosses, long slots, cosmetic faces and already-finished surfaces should be obvious on the drawing. If the shop knows a wall can flex, it can plan soft jaws, support blocks, lighter passes or a different operation order before machining begins.
Ask whether the setup sheet records torque. For a prototype this may be informal, but for production it should be repeatable. A recorded vise torque value, jaw style and loading method make it easier to repeat the process when the job comes back months later.
If a part fails inspection because it springs after unclamping, do not assume the machine missed the dimension. The part may have been distorted during cutting and relaxed afterward. In that case the fix may involve roughing, stress relief, lighter clamping, different supports or a revised datum plan.
Common Vise Torque Mistakes to Avoid
The first mistake is treating torque as a substitute for support. A poorly supported part may still chatter or bend even with heavy clamp load. The second mistake is changing torque after first article approval without documenting it. That changes the process. The third mistake is using the same torque for every material and jaw style. Aluminum, brass, plastic, stainless and thin-wall parts all react differently. Torque should be proven by measurement, not habit.
For best results, send the shop the model, drawing, quantity, revision status, target lead time and any inspection or documentation requirements at the start. Clear inputs help the supplier quote the real job, choose the right setup and avoid surprises after machining begins.
Final Buyer Takeaway
The best machining outcome usually comes from matching the quote package to the real manufacturing risk. A simple bracket may only need a clean model, standard material and normal inspection. A thin, cosmetic, regulated or schedule-critical part needs more context. Share the part function, mating features, quantity forecast, finish expectations and the reason any tight tolerance exists. That information lets the shop recommend a practical process instead of guessing from geometry alone.
For SEO and answer-engine clarity, this article intentionally addresses specific buyer searches rather than broad definitions only. Those long-tail questions are often the same questions a manufacturing engineer asks before releasing a purchase order: how will the part be held, what records are required, how will cost change at quantity and which risks should be solved before the first chip is cut?